Matter - Water / liquid
Last edited - April 23, 2024
A unit with lesson plans, activities, & lab notes for the middle grades
Questioning is the beginning of all learning.
- Introduction
- Big ideas, concepts, facts, & outcomes
- Science content concepts & outcomes
- Inquiry, process, & cross cutting concepts & skills & outcomes
- Pedagogical information
- Unit activities sequence
- Focus questions
- Materials
- Scoring guide suggestions
- Lesson plans
- Activity 1 - Water, balloons, and other solid, liquids, & gases to review / assess the properties of solids, liquids, & gases
- Activity 2 - The shapes of liquids
- Activity 3 - Surface level of liquids
- Activity 4 - Properties of liquids
- Activity 5 - Density of liquids & Oobleck, solid, or liquid?
- Activity 6 - Colored drops in water
- Activity 7 - Mixing colored drops in plain or & salt water
- Activity 8 - Mixing colored drops from four different solutions - Teacher preparation of materials REQUIRED
- Activity 9 - Colored drops in different temperatures of water
- Activity 10 - Mixing without mixing & discovery Exploration of different volumes and temperatures of water
- Activity 11 - Mixing different temperatures and volumes of water
- Activity 12 - Water Drops & surfaces
- Activity 13 - Water Drops on a Coin
- Activity 14 - Pepper on the Plate
- Activity 15 - What is Surface Tension?
- Activity 16 - Soak Those Sharks
- Activity 17 - How a Plant Carries Water
- Activity 18 - The S.S. Paper Clip
- Activity 19 - Skittle chromatography
- Lab notes
- Water, balloons, & other solid, liquids, & gases to review properties of solids, liquids, & gases
- The shapes of liquids
- Surface level of liquids -
- Properties of liquids
- Density of liquids & Oobleck, solid, or liquid?
- Colored drops in water
- Mixing colored drops from four different solutions
- Colored drops in different temperatures of water
Introduction
This plan investigates water and its properties as one state of matter. Properties of how it takes up space, has volume, mass, exerts pressure, flows through space, its attraction to itself and to other particles, and its energy as measured by temperature.
It is one unit from of a sequence of units that investigate matter to review and develop a deeper understanding of its properties and states: solid, liquid, and gas/air.
It includes detailed plans, suggestions, solutions, worksheets, or lab notes, and material list of items which are easy to obtain from home or thrift stores. While the scope of the sequence of activities is very comprehensive, for a middle level unit, the activities may be used in many other ways or combinations for more targeted learning experiences.
Related activities
- Matter - solid liquid, & air/gas
- Air
- See Inverted Jar With Two Holes Investigation which includes an extensive list of learner responses for different levels of understanding for how water does and does not enter an inverted jar.
- Bubbles
- Liquid - water
- Water themed unit
- Pressure
- Heat energy activities
- Heat energy hot cold - Learning cycle inquiry lesson with lesson plans, examples, video, materials, and lab notes to explore: hot & cold with touch, a variety of activities using water, mixing hot & cold water, warming ice water to boiling, salt & ice, temperatures of cars in sunshine, blowing hot & cold bubbles, conduction, convection, & radiation.
- Heat energy and conservation - candle and heat
- Plasma
Planning information
Learner background information
A plan designed for learners who have prior knowledge in cause and effect. The use of observations to make inferences, models as explanations for observable and non observable events, change, relative position, and working in groups is helpful, but not necessary. Basic understanding of solid, liquid, and gas as in (matter unit) is helpful.
Intended learnings & learner's thinkings
Content Big ideas, concept & facts, & outcomes
(Source concepts & misconceptions)
Big ideas and specific outcomes:
We understand our world and make decisions based on our understanding of the physical matter in it, the properties they have and how we interact with matter, and how we can use them to make our lives better.
Concepts and facts
- Matter - liquids
- Properties
- Equilibrium
- When objects exert equal forces on each other they are at equilibrium.
- When objects are not in equilibrium one will displace the other.
Outcome
Explain properties of water and how they are important for life on Earth.
Science concepts: physical, earth, life
Big ideas: Liquids have many properties:
Related concepts & facts for liquids
- Liquids are a state of matter (solid, liquid, gas, & plasma). Therefore, it takes up space (volume) and has mass.
- Liquids and gases exert a force or pressure.
- Liquids and gases flow when they exert unequal pressure on each other.
- When pressures are equal they are at equilibrium.
- Solids, liquids, and gases exert more pressure at the bottom than at the top.
- Liquids pour, flow, and spread out.
- Liquids will flow to the lowest possible space.
- Liquids will flow until they interact with another object.
- Different kinds of liquids, depending on how thick they are, flow (spread out) at different rates.
- When they interact with another object they can change their direction, move other objects (matter), solids, liquids and gases, or be contained. Because no two objects can occupy the same space at the same time.
- No two objects can occupy the same space at the same time.
- Liquids can be pushed out of the way by solid objects, other liquids and gases.
- Usually liquids are contained in a solid container.
- Liquids which are contained will take the shape of the container.
- The surface of the liquid is level to the ground.
- Different liquids can have different and similar densities.
- When liquids are not in a container, they will flow at different speeds (rates) and some will spread out more than others.
- The properties of liquids are transparent, colored, opaque, viscous, translucent, bubbly, and foamy.
- Liquids have a temperature that is a measure of heat energy.
- Different concentrations may have different or similar densities.
- Concentration is the amount of a given substance within a solution.
- Solutions are a liquid mixture in which the minor component (the solute) is uniformly distributed within the major component (the solvent).
- Solvent is a liquid that can disolve a substance (the solute) to make a solution.
- Solute is a substance that a liquid can disolve to make a solution.
- Liquids of different temperatures have different densities.
- When water particles get near each other they attract which gives them some interesting qualities such as adhesion, cohesion, capillary action, and surface tension.
- The attraction and attaching of water to itself is called cohesion.
- The attraction and attaching of water to something else is called adhesion.
- The strong attraction of water particles at the surface, to itself and other objects is known as surface tension.
- The attraction of water helps particles move upward in tubes or spaces, which is known as capillary action.
Outcome
- Use accurate verifiable information to consider properties of liquids and how understanding them can influence us in making decisions.
- Describe water as a liquid that is matter that takes up space and has mass. It exerts a force and flows when not at equilibrium.
- Describe that liquids flow and take the shape of a container. And if they are not in a container, they will flow at different speeds (rates) and some will spread out more than others.
Related concepts & facts for heat energy & temperature
- Heat energy is related to the amount of particle (atom, molecule) movement in a substance.
- Heat is transferred from a source to a receiver.
- Heat is transferred in predictable ways, flowing from warmer objects to cooler ones, until both reach the same temperature (equilibrium).
- Heat can be transferred by touching of particles (collisions of atoms conduction), or through space (by rays radiation) or currents in a fluid (convection).
- Heat energy is the disorderly motion of molecules and in radiation.
- Insulator is a material that has a slower transfer of energy.
- Conductor is a material that easily transfers energy.
- See more energy concepts
- See temperature in heat concepts.
Outcomes
Heat, energy, transfer, & temperature of solids
- Describes hot and cold as a measure of heat energy.
- Describes temperature increases and decreases as directly related to the amount of heat energy.
- Describes heat energy as directly related to the amount of random motion of the particles (atoms,molecules).
- Describes the exchange of heat energy as a product of the temperature differences and mass differences of all the objects involved in the exchange.
- Describe how heat transfer affects our daily lives and relates to the world in which we live.
Mixing water
- Measure the temperature of liquids.
- Explain the temperature of the water and the volume of water are both important to understanding the resulting temperature.
- Explain what happens when two equal amounts of water with two different temperatures (like 0 degrees Celsius and 30 degrees Celsius) are mixed together.
- Describe how the temperature of mixing two equal amounts of water with different temperatures will change.
- Describe how the temperature of mixing a small amount of water at one temperature with more water at another temperature will change.
- Use findings to predict how long it will take to cool or heat objects to a certain temperature.
- Use finding to predict how much cold water they need to mix into hotter water to make it a certain temperature.
Anticipated learner thinkings & misconceptions
Misconceptions for matter
Scoring guides suggestions (rubric)
Water as matter (scoring guide)
Top level
- Describe Water / liquid is matter, takes up space, has mass, and will flow downward unless there is matter to stop its flow. It exerts a force and flows when not at equilibrium. When it flows it can be stopped by a solid, a more dense liquid or a gas under pressure.
- Describe water as a liquid that is matter that takes up space and has mass.
- Describe that liquids flow and take the shape of a container. And if they are not in a container, they will flow at different speeds (rates) and some will spread out more than others.
- Water takes the shape of its container.
- Water flows.
- Can feel water so it has mass / weight.
Lower level
Scoring guide for temperature transfer
Top level
- High level: Explains heat is transferred in predictable ways from a source to a receiver. Flowing from warmer objects to cooler ones, until both reach the same temperature. Some materials conduct heat energy better than others, which can effect peoples perceptions of temperature.
- Middle level: Explains heat energy as something different than the object itself. Something that can be transfered from one thing to another.
- Low level: Explains heat with I don't know, or as something with magic like qualities: like heat being a substance continuously generated within the object. Like a blanket, coat, glove, ... generates and gives off heat without consideration of limited supply or conservation of energy.
Lower level
See more activities for heat & temperature
Inquiry, process, & cross cutting concepts & skills
Inquiry (How science inquires for understanding: process, skill, methodology, practice)
When I experiment I collect observations of properties to describe different objects and can use those properties to describe change (whem properties change they become variables) when objects and systems interact. This helps me make claims to explain what is happening, and make models to predict what might happen in the future.
Related concepts and facts
Properties of objects are determined by the elements from which they are made. Properties can remain constant, change, and be measured. They are used to identify objects, as variables in experiments, operational definitions, and explanations. Properties of matter include: color, texture, size, shape, mass, volume, density, temperature, chemical, energy, states of matter (solid, liquid, gas, plasma) and the ability to interact with other objects. Properties can be measured with scientific tools and compared to a standard unit (linear, time, temperature, mass, volume, and density)
- Observed changes can be described as changes of properties (variables).
- Variables are observations of a property that changes - size, shape, temperature, amount, volume, rate, ...
- When people disagree on an observation, they usually make more and better observations.
- Observation, creativity, and logical argument are used to explain how variable changes effect resulting observations.
- Observed changes can be explained as being caused by changes of variables (changes of properties/ characteristics).
- Explanations are based on observations.
- Evidence is observation.
- Inference is an explanation based on observation.
- When people disagree on explanations, they can make more observations or change their explanation.
- Better decisions are made when information is verified before being considered accurate and used to reason and develop explanations and models to understand the world and make decisions.
- People make better decision when they understand and consider the positive and negative influences that effect their decision making.
Outcome
- Use accurate verifiable information to consider properties of liquids and how understanding them can influence us in making decisions.
- Describe change as a result of interactions. Describe those interactions as changes of a characteristic/ property (variable) that interacts with the object that changes (model).
Specific outcomes -
- Describe properties of water and use them to explain and model water interacts with other matter (solids, liquids, & gases).
Cross cutting
Systems, Order, & Organization; Evidence, Models, and Explanations; Constancy, Change, and Measurement; Evolution and Equilibrium; Form and Function
See more proceess concepts & misconceptions
Related concepts and facts
- Observational data and reasoning is used to explain interactions. Evidence is something that
is observed and can be used to understand what is happening and make predictions
about future changes.
- Explanations are based on observation derived from experience or experimentation and are understandable.
- Pictures or symbols can represent objects.
- Tables, charts, and graphs can be used to organize information to help understand.
- System is a group of related objects that works together for a particular purpose.
- When parts are put together they can do things they can't do alone.
Model
- Models are structures that correspond to real objects, events, or classes of events that have explanatory and predictive power (physical objects, plans, mental constructs, mathematical equations, computer simulations...) that may or may not be observed with real objects, systems, and events.
- Model is an explanation based on observations, facts, laws, inferences, thought, and reasoning.
- Models represent systems or things used as an example to follow or imitate to provide an explanation.
- Models can be used to think about events or processes that happen very slow, fast, or on a too small or large scale to change easily or safely.
- Mathematical models can be displayed on computers and changed to see what happens.
- Models are used to represent things in all dimensions of science physical, earth, and life science.
- Models are created with similar processes, which can be an algorithm or procedure. Such as in the following diagram.
- A model, though different from the real thing, can be used to learn something about the real thing.
- Seeing how a model changes may suggest how the real thing works if the same were done to it.
- Models make predictions.
- More than one model can represent the same thing or event.
- The kind of model and its complexity depend on the purpose of using the model.
- Models are never exact representations.
- A model that is too limited or complicated may not be useful.
- A model represents entities and the relationships between them.
- There are two basic types of models, physical and conceptual. Conceptual communicate through words and drawings, or can be physical and demonstrable.
- Models help generate ideas, solve problems, make predictions, help think.
- Models can be used to represent new ideas and inventions.

Outcome -
- Make observations of change, identify variables associated with the change, and create explanations and models of how the variables effect those changes.
Specific outcomes -
- Identify properties that change.
- Relate variables to change with an explanation.
- Generalize explanations of how properties change as models to explain future situations.
Perspectives
Engineering & Technology
- People have always had problems and invented tools and techniques (ways of doing something) for scientific inquiry and technological design.
- The two have similarities and differences.
- Scientists propose explanations for questions about the natural world, and engineers propose solutions relating to human problems, needs, and aspirations.
- Technologies exist within nature and so they cannot contravene physical or biological principles. Technological solutions and technologies they have side effects, costs, carry risks, and provide benefits.
- Many different people in different cultures have made and continue to make contributions to science and technology.
- Technology is essential to science, because it provides instruments and techniques that enable observations of objects and phenomena that are other wise unobservable due to factors such as quantity, distance, location, size, and speed.
- Technology provides tools for investigations, inquiry, and analysis.
- Science and technology are reciprocal.
- Science helps drive technology, as it addresses questions that demand more sophisticated instruments and provides ideas for better instrumentation and technique. Technological designs have constraints that engineers, architects, and others must take into account to solve practical problems.
- Some constraints are unavoidable, for example, properties of materials, or effects of weather and friction; other constraints limit choices in the design, for example, environmental protection, human safety, and aesthetics.
- The knowledge base for science is recorded in print and electronic media and can be found and understood by people in and out of classrooms
Personal and Social Science
- The application and the use of models in science and technology can and will benefit society.
- Model helps me internalizing or abstracting understanding.
Nature of Science
- Science can provide ideas for our protection and desire for a better life.
- Scientists use models.
History of science
See also Concepts & misconceptions also science, math, technology timeline
- People have practiced science and technology for a long time.
- Science develops over time.
- Science investigators such as
Strategies and activities to achieve intended learnings
Are designed based on the learning cycle theory & method
Pedagogical Overview
Supporting information
Information in this plan is written for teachers and other adult readers. For learners, concepts such as, mass, volume, density, molecules, ... require much experience with physical objects as models and the development of logical thinking. As learners develop these concepts starting with concrete objects for which they are familiar and moving toward more formal reasoning can be a good way to scaffold their understanding. Such as molecules, which might be more appropriately referred to as pieces of water, water particles, etc. The terms cohesion and adhesion could be termed as stickiness and could be used interchangeably. The correct use of terminology and full understanding in cases like these would not be expected until junior high.
Activities Sequence to provide sufficient opportunities for learners to achieve the targeted outcomes.
Make sure learners have the prior knowledge identified in the background information.
- Activity 1 - Water, balloons, and other solid, liquids, & gases to review / assess the properties of solids, liquids, & gases
- Activity 2 - The shapes of liquids
- Activity 3 - Surface level of liquids
- Activity 4 - Properties of liquids
- Activity 5 - Density of liquids & Oobleck, solid, or liquid?
- Activity 6 - Colored drops in water
- Activity 7 - Mixing colored drops in plain or & salt water
- Activity 8 - Mixing colored drops from four different solutions - Teacher preparation of materials REQUIRED
- Activity 9 - Colored drops in different temperatures of water
- Activity 10 - Mixing without mixing & discovery Exploration of different volumes and temperatures of water
- Activity 11 - Mixing different temperatures and volumes of water
- Activity 12 - Water Drops & surfaces
- Activity 13 - Water Drops on a Coin
- Activity 14 - Pepper on the Plate
- Activity 15 - What is Surface Tension?
- Activity 16 - Soak Those Sharks
- Activity 17 - How a Plant Carries Water
- Activity 18 - The S.S. Paper Clip
- Activity 19 - Skittle chromatography
Focus question
Unit focus question:
What is water? How do we use it and respect it?
Sub focus questions:
- What is matter?
- What is water?
- What are the properties of water? occupies space, has mass, exerts a force or pressure.
- Is water matter?
- What causes water to flow?
- How do you describe water?
- Is water a liquid?
- What causes liquids to flow?
- What happens when the same liquids with different colors are mixed?
- What happens when different liquids of different colors are mixed?
- What happens when the same liquids with different temperatures (hot and cold) are mixed?
- What happens when different liquids of different or similar densities are mixed?
- What is water pressure?
- What is bouyancy?
Materials
- Different liquids, food coloring, water, tubs, balloon
- 12 small containers per group, 1-4 eye droppers per group, kosher salt, green, red, blue food coloring, paper towels, soapy water, hot and cold water And ... Four mystery solutions which require teacher preparation of four different colored salt water solutions. See Activity 4 - Colored drops in colored liquids for recipe.
Resources and Materials
- lab note 1 - Water, balloons, and other solid, liquids, & gases to review properties of solids, liquids, & gases
Lesson Plans
Activity 1 - Water, balloons, and other solid, liquids, & gases to review / assess the properties of solids, liquids, & gases
Materials
- Balloons inflated to different sizes (at least three), tub of water,
- Assorted solids and liquids (blocks, water, paint, book, juice, shoe, etc.)
- Lab note
Focus questions
- What happens to water when a balloon is pushed into it?
- What are the properties of liquids and solids?
Learning outcomes
- Explain how the balloon takes up space and it will push the water aside. Both can not occupy the same space at the same time.
- Give examples of how water takes up space.
- Give examples of how water flows.
- Classify objects as solid or liquid
Scoring guide for Liquids
Suggested procedures overview :
- Push a balloon into water.
- Observe how the water moves.
- Draw and explain how the balloon pushes the water aside and will change the level of the water in containers.
- Describe a general explanation as a model.
Exploration to review / assess what they know about properties of solid, liquid, & gas
- Put learners into groups or have learners take turns to demonstrate the investigation.
- Blow up a balloon and tie it off.
- Ask. What will happen when the balloon is put into the water? Accept all answers.
- Let the learners demonstrate putting different sized balloons into the water, observe what happens, and construct explanations for what is happening. The balloon is pusing the water out of the way because it is matter and matter can't occupy the same space.
- Ask. Is the water a solid, liquid, or gas? liquid
- Ask. Is the balloon a solid, liquid, or gas? a tricky question? it is both. The balloon is solid and it is filled with a gas.
- What do each act like when the ballons are put in the water? The water acts like a liquid and flows out of the way and the ballon acts like a solid and pushes the liquid water out of the way.
- Depending on the learner's interest and depth of explanation, you may decide to begin recording properties of solid, liquid, and gase. However, it isn't necessary at this time as there will be more opportunities after the next activity.
- Create a display of about 3 liquids and 3 solids.
- Tell. Look at the objects on display.
- What objects are similar? Accept all answers & record their ideas.
- And what items are different? Accept all answers & record their ideas.
Invention
- Ask. How can we categorize the objects into two groups? Circle or organize the categories into groups.
- Ask. What properties are similar for the objects in each group? Accept all logical answers and let them illustrate how their chosen property determines a classification.
- If they haven't grouped them into solids and liquids, repeat the procedure.
- If they still haven't grouped them into solids and liquids, offer a prompt. Or you can suggest they do so or you could group them into those two categories and ask them to guess what property you used to classify them.
- With objects grouped as solids and liquids.
- Ask. What are the properties that are similar for the objects in each group?
- Write a list of the suggested properties. This is an introductory ativity and learners don't need a solid (pun intended) understanding at this time. Activities will follow to develop depth.
- Solid - doesn't change shape easily, has a fairly set volume and mass,
- Liquid - flows, takes the shape of the container has a fairly set volume and mass,
- Have them select one of the objects and ask. Why does it belongs there and how they know. Observation of a particular property by or as ...
- Ask. What else do you know about solids and liquids? Add to the list of properties of solids and liquids.
- Have them explain why each object is classified as a solid or liquid.
- List properties of solids and liquids on a chart or board. Don’t worry if they don’t get a lot of them at this time as the list can be added to during the rest of the activities.
Discovery
- Ask. What can we learn from the results?
- Ask. What are some examples of other solids and liquids we use everyday?
- Ask. Why would scientist want to group objects by common properties?
- Ask. Can you think of other such groupings? gases, plasma? ...
- Ask. How important are observation for understanding the world?
- Ask. How important are observation for scientists?
- Ask. Was there a time today when you were skeptical about another person’s idea or your own ideas?
- Ask. Do you think it is important for scientists to be skeptical. Why or why not?
Activity 2 - The shapes of liquids
Materials :
- Different shaped pans & containers, cookie cutters, water, other liquids (honey, juice, crude oil, glycerin, molasses, corn syrup), paper towels, soapy water container to use to clean up. While it is nice to explore other liquids, which are more viscous (thick and sticky), they can be hard to clean up after using. Might want to explore them as a demonstration and use Wax paper inside a flat tray or baking sheet for quick clean up.
- Lab notes
Focus questions :
- Do liquids have a shape?
Learning outcomes
Describe that liquids flow and take the shape of their container.
Scoring guide for Liquids
Suggested procedures overview :
- Put learners in groups, focus their attention, and assess their initial understanding of the focus questions.
- Activity - Explore liquids in different containers and what happens when they are not in a container.
- Conclude that liquids flow and take the shape of a container. And if they are not in a container, they will flow at different speeds (rates) and some will spread out more than others.
Exploration
Activity:
- Put learners into groups.
- Ask. Do liquids have a shape? Accept all answers
- How do you know? Accept all answers
- Display the materials and ask learners to explore their ideas to test the shape of liquids.
- Ask. What ideas do you have? Have them share ideas and build on each others suggestions until you are satisfied that what they set of to do will be productive.
- Tell them to record what they did and the results they observed in their Lab notes. about what the water / liquids does or goes.
Invention
- Share their drawings and discuss what happened when the liquid is poured into the cookie cutter? It fills the cookie cutter.
- Describe what happened to the liquid when they lifted the cookie cutter.The water pours (flows) out.
- Describe what happens to the liquid when it is put inside a container.
- Discuss their results and explanations.
- Ask how what they did in activity two fits with activity one.
- Ask. How can we summarize the properties of water? Might suggest that they think about how the water operated when they manipulated it and it interacted with other objects (operational definition).
- Liquids flow and spread out
- Different kinds of liquids, depending on how thick they are, flow (spread out) at different rates,
- Liquids will flow until they interact with another object.
- When they interact with another object they can change their direction or be contained.
- Usually liquids are contained in a solid container.
- Liquids which are contained will take the shape of the container.
- Liquids are matter that take up space and has mass. It exerts a force and flows when not at equilibrium.
- When liquids are not in a container, they will flow at different speeds (rates) and some will spread out more than others.
- Did they learn anything today that they could put on their solid and liquid chart, or is there something already there that today’s activity would add more evidence?
- Why is this important to know?
- How did they work like scientists today?
- How did they use observation?
Discovery
- Next activities: surface levels of liquids, properties of liquids
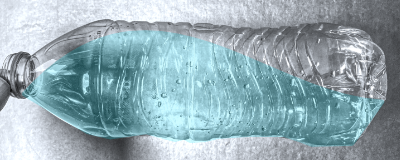
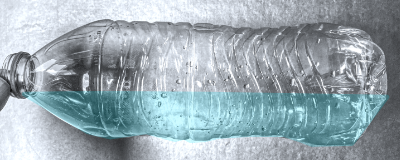
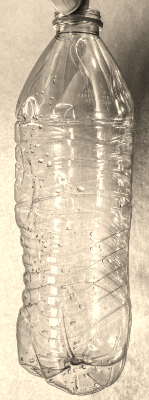
Activity 3 - Surface level of liquids
Materials :
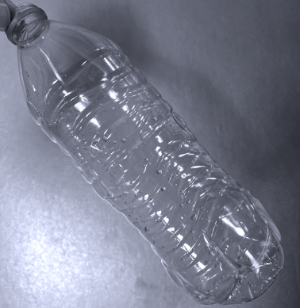
- A clear bottle approximately half full of water for each learner
- Lab notes
Focus questions :
- What do youknow about the surfaces of liquids?
Learning outcomes
Describe the surface of different containers of liquids.
Scoring guide for Liquids
Suggested procedures overview :
- Put learners in groups, focus their attention, and assess their initial understanding of the focus questions.
- Activity - Explore the surfaces of liquids in different containers and what happens when they are manipulated.
- Conclude the surface of liquids will be level with the Earth's surface.
Exploration
- Put learners into groups.
- Ask. What will happen if we put water in this bottle?
- Draw a picture.
- Draw pictures of bottles on the board with an impossible water surfaces.
- Challenge the learners to make the water level in their bottle look like the pictures on the board. The water must be motionless.
- After the they have experimented for a while, have them share their results.
Invention
- Discuss why the challenge is impossible.
- Change the picture on the board and challenge them to represent what is drawn on the board with their bottle.
- Discuss why this challenge worked.
- Continue to draw pictures that they can represent in their bottles. Examples:

Empty bottles to draw water in them!
- Learners will conclude the shape of the surface level of liquids and create a chart with different categories of surface levels.
- How can we use this information in daily life?
- Have them draw their own picture of an impossible water level and explain why it’s impossible.
- How do scientists use illustrations.
- How do scientists use charts to organize information?
Discovery
Review and add to list of properties of liquids as appropriate for the learners.
Properties of liquids
- Liquids are matter that take up space and has mass. It exerts a force and flows when not at equilibrium.
- Liquids flow and spread out
- Different kinds of liquids, depending on how thick they are, flow (spread out) at different rates,
- Liquids will flow until they interact with another object.
- When they interact with another object they can change their direction or be contained.
- Usually liquids are contained in a solid container.
- Liquids which are contained will take the shape of the container.
- When liquids are not in a container, they will flow at different speeds (rates) and some will spread out more than others.
Activity 4 - Properties of liquids
Materials
- Water, food coloring, hand soap (white), dish soap (blue or green), fabric softener, corn syrup, cooking oil, seven clear bottles.
- Lab notes
Focus questions :
- What are the properties of liquids?
Learning outcomes
Review the properties of liquids and add to them:
Suggested procedures overview :
- Put learners in groups, focus their attention, and assess their initial understanding of the focus questions.
- Activity - Review the properties of liquids an add to them.
- Conclude ...
Exploration
- Put learners into groups.
- Display the seven bottles of liquids.
- What are some ways we can investigate the liquids without opening the bottles? (shake, roll, tip, etc)
- Have learners explore the liquids and record their observations for each action.
- You may need to provide a chart with the action written in each cell so that they can draw a picture and write an explanation for each action.
- Have them share their observational data with the class.
- Have them classify them by their observations and provide reasons for each.
Invention
- Introduce vocabulary: transparent, translucent, viscous, opaque, foamy, and bubbly.
- Have them label their examples and explain their reasoning.
- Ask students if a liquid could be placed in more than one category?
- Add properties of liquids to the property chart.
- Think of other examples of liquids and classify them accordingly.
- Ask what are some properties of liquids?
Discovery
Review and add to list of properties of liquids as appropriate for the learners.
Properties of liquids
- Liquids are matter that take up space and has mass. It exerts a force and flows when not at equilibrium.
- Liquids flow and spread out
- Different kinds of liquids, depending on how thick they are, flow (spread out) at different rates,
- Liquids will flow until they interact with another object.
- When they interact with another object they can change their direction or be contained.
- Usually liquids are contained in a solid container.
- Liquids which are contained will take the shape of the container.
- When liquids are not in a container, they will flow at different speeds (rates) and some will spread out more than others.
- Liquids can be: transparent, translucent, viscous, opaque, foamy, and bubbly.
Activity 5 - Density of liquids & Oobleck: solid, or liquid?
Materials :
- Six clear cups for each group, paper towels, cooking oil, corn syrup, colored water
- Lab notes
Focus questions :
- What happens when liquids are mixed?
Learning outcomes
Describe that when liquids are mixed they can flow or they can be supported by another liquid if it is heavier (more dense).
Scoring guide for Liquids
Suggested procedures overview :
- Put learners in groups, focus their attention, and assess their initial understanding of the focus questions.
- Activity - Explore liquids in different containers and what happens when they are not in a container.
- Conclude that liquids flow and take the shape of a container. And if they are not in a container, they will flow at different speeds (rates) and some will spread out more than others.
Exploration
- What happens when two liquids are poured into the same container?
- Discuss the possible combinations of the liquids using only two at a time.
- Predict what will happen in each combination.
- Allow them to experiment with the combinations of liquids and record their observations.
Invention
- Discuss the results.
- Have them predict what would happen if all three liquids were poured in the cups in various combinations.
- Allow them to experiment with the liquids and record observations.
- Discuss the results and explanations for the reactions.
- Why is this important to know about liquids and how we incorporate them into everyday life?
Discovery Oobleck, liquid or solid?
Materials
- 1 cup cornstarch, 1 cup water, paper towels
Exploration
- Ask. Is cornstarch a solid?
- Why? Each grain has a definite shape that takes up space and has mass.
- What is water? liquid
- Why? It takes the shape of the bottle and has mass.
- Predict what will happen when the two are combined. Accept all answers. Like mud or soupy white mess.
- Have them combine the ingredients to make Oobleck.
- Let them explore it to show that it flows and will support objects set on top of it and ask if they can shape it so it will retain its shape or will always take the shape of its container?
- Ask. Is Oobleck a liquid or solid? Accept all answers AND ask...
- Them to justify and explain their reasoning.
- What other objects or systems can be organized as a combination of liquids & solids? Ex: Jell-O, cake batter, glue, et
https://www.homeofbob.com/science/actPlans/physical/waterJBCR.html
surfaceTenionMRKH
surfaceTenionMKMS
https://homeofbob.com/science/actPlans/physical/liquidsMMTT.html - water attraction
Activity 6 - Colored drops in water
Materials
- Red and blue food coloring, eye dropper, 4 small containers, water, and soapy water
- Lab note
Focus questions:
- What happens when different liquids are mixed?
Learning outcomes:
- Explain that water (liquids) with the same properties will flow together.
Scoring guide for
Suggested procedures overview:
- Put learners in groups, focus their attention, and assess their initial understanding of the focus questions.
- Activity - Put drops of food coloring into plain water and observe how they interact.
- Explain that food coloring is like the water and sorta blends with it depending on how its weight compares to the waters. Density is the ratio of mass to volume and the development of which requires the conceptualization of mass, volume, and ratio. See activity to assess ratio, proportion ...& range of possible levels of Answers ...
Exploration -
- Put learners in pairs.
- Ask. What will happen when a drop of red or blue food coloring is released in plain water? Accept all answers.
- If the learners don't question or ask for an operational definition for released, Might ask. How will we RELEASE the food coloring?Could be dropping above or below the surface or gently laying a drop at the surface. To release a drop below the surface put a dropper part way into the water and squeeze until the coloring flows out and then hold the dropper in place or slowly back the droper away. Observe if the drop rises or sinks or stays in place.
- Write all predictions on the board. Record all answers.
- Ask. How could you chart your observations? draw pictures to show how the food coloring moves.
- Have them write a procedure and record their observations.
- Put plain water in a small container.
- Squeeze a drop of red food coloring into the water:
- By gently laying it onto the surface Or
- Drop a drop three drops of food coloring from 5 cm above the surface Or
- Squeeze a drop from the dropper half way between the surface and bottom of the water.
- Record observations and explain what happens.
- Rinse the dropper.
- Put the same amount of water in the second container.
- Add a drop of blue food coloring to the water and repeat the agreed on procedure.
- Record observations so the class can view them.
Invention -
- Review observations.
- Ask. How can you explain what happened? The food coloring spread out and slowly ... sunk or floated up ...
- Discuss what happened. The food coloring is heavier than water so it went to the bottom or stayed on the bottom. The food coloring was lighter than water so it (stayed or went) to the top. If learners have studied density, then the explanations could include the concept of density. More dense than water or less dense than water.
- Ask. What changed when red and blue food coloring were added to the water? They were the same and the coloring spread out in the water.
- Ask. What variables were the same? The water in the small container.
- What variables were controlled? The way the drop was released, the drop, room, temperature,
- What variable changed? The color of the food coloring.
- Discuss why the results were the same or different. IF the same, the liquids are the same density (wight, mass, volume).
- Ask. How the chart helped them understand or use their observations? It showed what each did and will help us remember and compare later.
Discover
Following activities with salt water.
Activity 7 - Mixing colored drops in plain or & salt water
Materials:
- Food coloring, 2 droppers, 4 small containers, salt water, soapy water
- Lab note -
Focus questions:
- What causes liquids / water to move / flow?
Learning outcomes:
- Describe how gravity will cause heavier (more dense)
Suggested procedures overview:
- Put students in groups, focus their attention, and assess their initial understanding of the focus questions.
- Activity - Explore how different densities of water will interact as they are mixed.
- Describe how geravity causes heavier or more dense liquids to flow below less dense (less heavy) liquids.
Exploration
- Put learners in pairs.
- Ask. What will happen when a drop of blue or red food coloring is released in salt water? (Review RELEASED could be above, on, or below the surface.) Could be dropping above or below the surface or gently laying a drop at the surface. To release a drop below the surface put a dropper part way into the water and squeeze until the coloring flows out and then hold the dropper in place or slowly back the droper away. Observe if the drop rises or sinks or stays in place.
- Write predictions on the board. Accept all answers
- Ask. How could you chart your observations? Make a table or chart to combine previous activity colored drops in water with the results of colored drops in salt water.
| Liquid | Red drops in ... | Blue drops in ... |
|---|---|---|
Plain water |
||
Plain water |
||
Salt water |
||
Salt water |
- Have learners do the following and record their observations.
- Put salt water in a small container.
- Squeeze a drop of red food coloring into the salt water.
- Record observations and explain what happened.
- Rinse the dropper.
- Have them repeat for the second container.
- Put the same amount of salt water in the second container.
- Add a drop of blue food coloring to the salt water.
- Record your observation and explain what happened.
- Rinse the dropper.
- Have the class display their results so all can view.
Invention
- Review and discuss the displayed data.
- Describe how their observations changed when red and blue food coloring were added to the salt water.
- Ask. What variables were the same or controlled? And what variable changed?
- Discuss why the results were the same or different.
- Ask. Did the chart help?
- Ask. How the observations of food coloring in salt water compare to the observations of food coloring in plain water?
Discover
Activity
Activity 8 - Mixing colored drops from four different solutions - Teacher preparation of materials REQUIRED
Materials
- 12 small containers per group, 1-4 droppers per group, paper towels, and four mystery solutions
The four mystery solutions need to be made before class.
Recipe for mystery solutions (salt water solutions)
Use Kosher salt for a less cloudy solution. Add food coloring to a medium-dark solution. Light colored solutions are harder to observe.
- Green - 250 ml salt into 1000 ml water - most dense
- Red - 165 ml salt into 1000 ml water
- Clear - 60 ml salt into 1000 ml water
- Blue - None 1000 ml water - least dense
Directions for releasing a drop
To release a drop below the surface place the dropper part way into the water and squeeze. Observe if the drop rises or sinks.
Focus questions:
- How do different solutions mix?
Learning outcomes:
- Describe how drops of different densities interact in liquids with different densities.
- Could also include outcomes for concepts related to: combinations, concentration, temperature, expansion, volume, mass, control, variables, observation, evidence
Suggested procedures overview:
- Put learners in groups, focus their attention, and assess their initial understanding of the focus questions.
- Activity - released a drop below the surface place the dropper part way into the water and squeeze. Observe if the drop rises or sinks.
Exploration
- Challenge!! How could you combine the four different liquids? Insert mini challenge and lesson on combinations like hand shake ...
- Write their suggestions on the board. Accept all suggestions.
- Ask. How they could make a chart to show what happened when each liquid was released in each other liquid both above the surface and below the surface. Suggestion: A chart can be made with red, blue, clear, and green across the side and top. Label one the kinds (color) of drops and the other with the different solutions (color). Write the results in the corresponding cell. For example: If the drop goes down in a liquid, use an arrow pointing down. If a drop goes up, use an arrow pointing up . If a drop spreads, use a circle.
- Test all possible combinations of colors.
- Put results on the chart.
- Display all class data so all can see.
- Density from High - Green, Red, Clear, Blue - Low
| Color | Red solution | Blue solution | Green solution | Clear solution |
|---|---|---|---|---|
Red drop in |
X | ↓ | ↑ |
↓ |
Blue drop in |
↑ | X | ↑ | ↑ |
Green drop in |
↓ | ↓ | X | ↓ |
Clear drop in |
↑ | ↓ | ↑ | X |
Invention
- Review and discuss the displayed data.
- What can you conclude about the four liquids?
- If you had equal volumes of the four liquids, which would be the heaviest (most dense)?
- Rank the liquids in order from heaviest to lightest (greatest to least density).
- What did you learn about evidence and how important it is to collect good evidence to make explanations?
- What did you learn about making charts to record observations and understand data?
Discover
- Where can you find liquids with different densities?
- Next activity - Colored drops in different temperatures of water
Activity 9 - Colored drops in different temperatures of water
Materials
- Food coloring, 2 droppers, 4 small containers, hot and cold water, soapy water
- Lab notes
Focus questions:
- How will different temperatures of water interact?
Learning outcomes:
- Explain how room temperature drops of food coloring move when released in hot and cold water.
Suggested procedures overview:
- Put learners in groups, focus their attention, and assess their initial understanding of the focus questions.
- Activity -
Exploration
- Put learners in pairs.
- Ask. What will happen when a drop of blue or red food coloring is added to hot or cold water? (RELEASED could be above or below the surface anywhere from close to the surface to the bottom.)
- Write prediction on the board. Accept all suggestions
- Ask. How they could chart their observations.
- Review directions and how they will record their observations.
- Directions
- Put the same amount of hot water and cold water in two small containers.
- Squeeze a drop of red food coloring into each.
- Record observations and explain what happened.
- Rinse the dropper.
- Directions
- Put the same amount of hot water and cold water in two other containers.
- Add a drop of blue food coloring to each.
- Record observations and explain what happened.
- Rinse the dropper.
- Directions
- If you released all the drops above water, then repeat all of the above by releasing the drops below the surface of the hot and cold water.
- Record the observation and explain what happened.
- Rinse the dropper.
- Display all the results so all can view.
Invention
- Review and discuss the displayed data.
- Describe how their observations changed when the temperature of the water changed.
- Ask what happened when drops were released below the surface?
- Ask what variables were the same or controlled and what variable changed?
- Discuss why the results were the same or different.
- Ask how they had to change their chart.
- Ask how these observations compared with the previous activities.
Discovery
- Colored drops in different colored liquids
Activity 10 - Mixing without mixing
Materials
- Styrofoam cups, ml measuring cup or graduated cylinders, hot water, ice water, 2 thermometers
- Lab notes
- For more information see Science Curriculum Improvement Study (SCIS, SCIIS, SCIS 3)
Focus questions:
- What happens when two different temperatures of water are mixed without mixing?
Learning outcomes:
- Describe
Suggested procedures overview:
- Put students in groups, focus their attention, and assess their initial understanding of the focus questions.
- Activity -
Exploration
- Organize learners into groups and pairs.
- Mixing water without mixing Question:
- Will the temperatures of two liquids change if they aren’t directly touching?
- How might we find out?
- Possible procedure.
- Use a styrofoam cup and a plastic cup.
- Place 100 ml of hot water into the plastic cup and 100 ml of ice cold water into the styrofoam cup.
- Then place the plastic cup into the styrofoam cup.
- Record the temperature every minute.
Results:
Water temperature Time |
Hot H2O in styrofoam. | Cold H2O in plastic cup |
|---|---|---|
Start |
||
1 minute |
||
2 minutes |
||
3 minutes |
||
| 4 minutes | ||
| 5 minutes | ||
| 6 minutes | ||
| 7 minutes | ||
| 8 minutes | ||
| 9 minutes | ||
| 10 minutes - End |
- At about the 6-7 minute, ask each pair or group as you cruise the room: How could we make a picture of the reults? Make a graph.
- Display the results so all can view.
Invention
- Regroup as a class and share the results.
- Ask. How does the amount of energy given off by a source and the amount of energy received by the energy receiver compare? pretty close to being equal.
- If they aren't equal what happened to the energy that would make them equal? There was energy that was transferred to the air above the cups and even though the styrofoam cup is an insulation, there was energy transferred through it to the air outside of it.
- What would an energy chain look like? Energy in hot water / transfer to inside of plastic cup / transfer to outside of plastic cup / transfer to cold water / transfer to other cold water, transfer to side of styrofoam cup / transfer to outside of styrofoam cup / transfer to air / ...
Discovery
Mix water of different temperatures activities
Activity 11 - Mixing different temperatures and volumes of water
Materials:
- Styrofoam cup, plastic cup, hot water, ice water, 2 thermometers
- Lab notesfor discovery Exploration of different volumes and temperatures of water
- For more information see Science Curriculum Improvement Study (SCIS, SCIIS, SCIS 3)
Focus questions:
- How will the temperatures of hot and cold water change when they are mixed?
- How is energy transferred when warm and cold water mix?
Learning outcomes:
- Explain how the temperature of two liquids will meet between the two starting temperatures. Depending on the temperatures and the volume and mass of the liquids.
Suggested procedures overview:
- Put students in groups, focus their attention, and assess their initial understanding of the focus questions.
- Activity - explore how temperatures change when liquids of different temperatures are mixed.
- 100ml hot mixed with 100 ml cold
Exploration
- Organize learners into pairs or groups.
- Ask. How can we explore how temperatures change when liquids of different temperatures are mixed?
- Have learners record the temperature of the hot water and the cold water.
- Take 100 ml of each and put them in a styrofoam cup, mix with a thermometer and record the results.
- Results:
- Temperature before
- Temperature after
- Record the class results so all can view.
- For example: record -
- Team or Group ... , Cold Temperature, Hot Temperature, Mixed Temperature, for each
- Class Mean
Invention
- Ask. What patterns can we see in the data? Accept all answers
- How could you explain caused the results? Accept all answers
- Predict what the temperature would be if you mixed equal volumes of the following temperatures? 100 & 50; 200 & 100; 50 & 88, 0 & 5
Discover
- How would the energy transfer and temperature be different if the plastic container were made from a thick or thinner material?
- What further questions can you discovery?
- How would different volumes of water transfer differently?
- Like 100 ml hot and 50 ml cold or
- 50 ml cold and 100 ml hot or
- 75 ml hot and 100 ml cold ....
- Decide how assign different values to different groups and let them collect the data to share with the class.
- Share data and graphs.
- Ask. How can we represent the amount of energy insed each cup?
- For example 50 ml of 140 degree water compared to 50 ml of 70 degree water, compared to 100 ml of 70 degree water, to show the amount of enregy in each container (system). Could use a a rectangle or square as a model to explain the amount of energy in a substance?
- For the example: The
- 50 X 140 rectangle's area (7,000 squares)
- is more than 50 X 70 area (3,500 squares),
- but is the same as 100 X 70 (7,000 squares)
- Therefore,
- Area can be a model for the amount of energy in a certain volume with a certain temperature.
- Genius!
Activity 12 - Water Drops & surfaces
Materials :
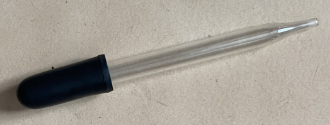
- Wax paper, water, eyedropper, toothpick
- Lab notes
Focus questions :
- D
Learning outcomes
De
Scoring guide for Liquids
Suggested procedures overview :
- Put learners in groups, focus their attention, and assess their initial understanding of the focus questions.
- Activity - Explore l
Exploration
Activity:
- Put learners into groups.
- Ask. What would happen if you dropped water on wax paper?
- Drop a few drops of water on wax paper using the eyedropper.
- Observe what happens. Does the water spread out or form droplets?
- With a toothpick break a drop into smaller and smaller drops.
- Observe what happens.
- Dip the toothpick in soap and put near the drops of water.
- Observe what happens.
- How would water on a waxed or unwaxed car be like what you observed in the activity?
Invention
- S
- Ask. How can we summarize the properties of water? Might suggest that they think about how the water operated when they manipulated it and it interacted with other objects (operational definition).
- Liquids flow and spread out
- Different kinds of liquids, depending on how thick they are, flow (spread out) at different rates,
- Liquids will flow until they interact with another object.
- When they interact with another object they can change their direction or be contained.
- Usually liquids are contained in a solid container.
- Liquids which are contained will take the shape of the container.
- Liquids are matter that take up space and has mass. It exerts a force and flows when not at equilibrium.
- When liquids are not in a container, they will flow at different speeds (rates) and some will spread out more than others.
- D
Discovery
- Next activities: surface levels of liquids, properties of liquids
Activity 13 - Water drops on a coin
Materials
- Penny, water in a cup, eyedropper, paper clip, straw
- Lab notes
Focus questions :
- D
Learning outcomes
De
Scoring guide for Liquids
Suggested procedures overview :
- Put learners in groups, focus their attention, and assess their initial understanding of the focus questions.
- Activity - Explore l
Exploration
Activity:
- Put learners into groups.
- Ask. What do you think will happen if you put water drops on a penny?
2. Place penny on a flat surface with the head facing up.
3. Predict how many drops of water can be put on the penny before it flows off.
4. Put the eyedropper into the cup and draw water up the stem.
5. Hold the end of the stem about 2cm above the penny and gently squeeze the rubber bulb so a drop of water is released (one at a time) to fall onto the penny. How is it important for everyone to hold the dropper the same way?
6. Count the drops as you put them on the penny.
7. Watch from the side as the water builds up on the penny.
8. Continue releasing drops of water until it overflows and runs off the penny.
9. Now flatten one end of a straw by creasing it and folding it over two or three times. Secure this end with a paper clip and repeat steps 1-6 using the straw as your dropper.
10. What did you notice about the water when it was on the penny? How many drops did it take for the water to overflow? Close or far from your prediction?
Invention
- S
- Ask. How can we summarize the properties of water? Might suggest that they think about how the water operated when they manipulated it and it interacted with other objects (operational definition).
- Liquids flow and spread out
- Different kinds of liquids, depending on how thick they are, flow (spread out) at different rates,
- Liquids will flow until they interact with another object.
- When they interact with another object they can change their direction or be contained.
- Usually liquids are contained in a solid container.
- Liquids which are contained will take the shape of the container.
- Liquids are matter that take up space and has mass. It exerts a force and flows when not at equilibrium.
- When liquids are not in a container, they will flow at different speeds (rates) and some will spread out more than others.
- D
Discovery
- Next activities: surface levels of liquids, properties of liquids
Activity 14 - Pepper on the plate
Materials
- 2 plates, warm water, cold water, pepper, liquid soap in small jar, toothpick
- Lab notes
Focus questions :
- D
Learning outcomes
De
Scoring guide for Liquids
Suggested procedures overview :
- Put learners in groups, focus their attention, and assess their initial understanding of the focus questions.
- Activity - Explore l
Exploration
Activity:
- Put learners into groups.
- Ask. What do you think will happen if you sprinkle pepper into water.
- Fill one of the pie plates with warm water and the other with cold water.
- Sprinkle some pepper onto the water in each of the pie plates and observe the results.
- Touch the tip of a toothpick to the liquid soap in the small jar.
- At the edge of the pie plate, slowly immerse the soapy toothpick into the pie plate filled with warm water.
- Repeat Procedure 3 and 4 using the pie plate with cold water.
- Observe the results.
- What happened to the pepper in both the warm and cold water? Why do you think this happened?
- How would this relate to when you are doing dishes?
Invention
- S
- Ask. How can we summarize the properties of water? Might suggest that they think about how the water operated when they manipulated it and it interacted with other objects (operational definition).
- Liquids flow and spread out
- Different kinds of liquids, depending on how thick they are, flow (spread out) at different rates,
- Liquids will flow until they interact with another object.
- When they interact with another object they can change their direction or be contained.
- Usually liquids are contained in a solid container.
- Liquids which are contained will take the shape of the container.
- Liquids are matter that take up space and has mass. It exerts a force and flows when not at equilibrium.
- When liquids are not in a container, they will flow at different speeds (rates) and some will spread out more than others.
- D
Discovery
- Next activities: surface levels of liquids, properties of liquids
Activity 15 - What is Surface Tension?
Materials :
- Long tall bottle or graduate, drinking glass or bowl, needle, soap or detergent, metal paper clips, water
- Lab notes
Focus questions :
- D
Learning outcomes
De
Scoring guide for Liquids
Suggested procedures overview :
- Put learners in groups, focus their attention, and assess their initial understanding of the focus questions.
- Activity - Explore l
Exploration
Activity:
- Put learners into groups.
- Ask. What do you think will happen if you drop a needle in a glass of water?
- What about a paperclip?
- Fill a tall jar or graduate to about _ inch from the top with water.
- Looking at the jar or graduate ay eye level, look at the spot where the water meets the sides of the jar or graduate.
- Ask students to determine if this surface of the water is flat, curved up, or curved down.
- Fill a drinking glass or bowl to the very top of the container making the water as level with the top of the container as possible.
- Carefully place a needle on the surface of the water carefully lowering it slowly and horizontally.
- After the needle has floated for about a minute, slowly touch the surface of the water with a bi of soap or a drop of liquid detergent. Observe the results.
- Start from scratch. Add water to the jar or glass until the water level is even with the edge of the top.
- Ask students to estimate how many paper clips they think can be added to the water without the water spilling over the edge.
- Add paper clips carefully to the jar or glass full of water until the water runs over the top.
- What did you find out about water from your experiment?
- Does this have anything to do with things floating on water? Explain? Water bugs? Boats?
Invention
- S
- Ask. How can we summarize the properties of water? Might suggest that they think about how the water operated when they manipulated it and it interacted with other objects (operational definition).
- Liquids flow and spread out
- Different kinds of liquids, depending on how thick they are, flow (spread out) at different rates,
- Liquids will flow until they interact with another object.
- When they interact with another object they can change their direction or be contained.
- Usually liquids are contained in a solid container.
- Liquids which are contained will take the shape of the container.
- Liquids are matter that take up space and has mass. It exerts a force and flows when not at equilibrium.
- When liquids are not in a container, they will flow at different speeds (rates) and some will spread out more than others.
- D
Discovery
- Next activities: surface levels of liquids, properties of liquids
Activity 16 - Soak Those Sharks
Materials
- Paper towels brown paper bag, old white cotton sweat sock, sheet of typing paper, blue food color, 13 x 9 baking pan, blunt-tipped scissors, pencil, hanger, string, metric ruler, tape, spoon.
- Lab notes
Focus questions :
- D
Learning outcomes
De
Scoring guide for Liquids
Suggested procedures overview :
- Put learners in groups, focus their attention, and assess their initial understanding of the focus questions.
- Activity - Explore l
Exploration
Activity:
- Put learners into groups.
- Ask. Do you think that water could mover upward?
- Explain your answer.
- Trace a shark pattern onto a piece of typing paper and cut out. Measure the shark and record the length in centimeters.
- Use the typing paper shark to cut sharks from the sock, paper bag, and a paper towel. You will now have four sharks.
- Tape the sharks’ tails to the bottom of the hanger so the sharks’ tails are evenly spaced across.
- Fill the baking pan half full of water and add 4 drops of blue food coloring to create an ocean.
- Tie a string to the hook of the hanger and suspend the hanger so that just the noses of the sharks are in the ocean. Record the time that the sharks took their dive.
- Leave the sharks’ noses in the ocean until one of the sharks is completely soaked. Remove the sharks and record. Lay the sharks on a paper towel covered surface and let them dry.
- Measure the distance from each shark’s nose to the blue line left by the ocean and record those on a chart.
- Look at the distances you recorded for each shark in the chart.
- Discuss the results of each shark.
- What might this relate to in nature?
Invention
- S
- Ask. How can we summarize the properties of water? Might suggest that they think about how the water operated when they manipulated it and it interacted with other objects (operational definition).
- Liquids flow and spread out
- Different kinds of liquids, depending on how thick they are, flow (spread out) at different rates,
- Liquids will flow until they interact with another object.
- When they interact with another object they can change their direction or be contained.
- Usually liquids are contained in a solid container.
- Liquids which are contained will take the shape of the container.
- Liquids are matter that take up space and has mass. It exerts a force and flows when not at equilibrium.
- When liquids are not in a container, they will flow at different speeds (rates) and some will spread out more than others.
- D
Discovery
Activity 17 - How a Plant Carries Water
Materials
- Fresh celery stalks with leaves, glass of water, red food coloring, hand lens
- Lab notes
Focus questions :
- D
Learning outcomes
De
Scoring guide for Liquids
Suggested procedures overview :
- Put learners in groups, focus their attention, and assess their initial understanding of the focus questions.
- Activity - Explore l
Exploration
Activity:
- Put learners into groups.
- Ask. How do you think plants get water?
- Place several drops of red food coloring in a glass of water.
- Cut off the bottom of the stalk of celery.
- Place celery stalk in glass of colored water.
- After about an hour, remove celery from water.
- Break celery in middle and observe.
- Draw a picture of what you see.
- Try the same activity with white flowers like daisies or carnations. Use different colors of food coloring.
- Discuss what happened to the celery.
- How does this relate to plants?
Invention
- S
- Ask.
- D
Discovery
Activity 18 - The S.S. Paper Clip
Materials
- Paper clips, container for water, water, alcohol, liquid detergent, toothpicks
- Lab notes
Focus questions :
- D
Learning outcomes
De
Scoring guide for Liquids .... Density
Suggested procedures overview :
- Put learners in groups, focus their attention, and assess their initial understanding of the focus questions.
- Activity - Explore l
Exploration
Activity:
- Put learners into groups.
- Ask. Do you think a paperclip can float on water? Explain.
- Use a container that is clean and completely free of soap. Fill it full of water.
- Bend the center of a paper clip out to form a cradle.
- Use the cradle to lower another paper clip very slowly onto the surface of the water.
- Keep trying until you get the paper clip to float.
- Look carefully at the floating paper clip from the top and the side. Record observations.
- Use the end of a toothpick to add some alcohol near the paper clip.
- Use another toothpick to place one drop of liquid detergent on the water’s surface near the paper clip.
- Record and discuss observations.
- How can you use what you learned from this experiment?
Invention
- S
- Ask.
- D
Discovery
Activity 19 - Skittle chromatography
Materials
- Skittles, plate, water
- Lab notes
Focus questions :
- What happens when a substance is place in water?
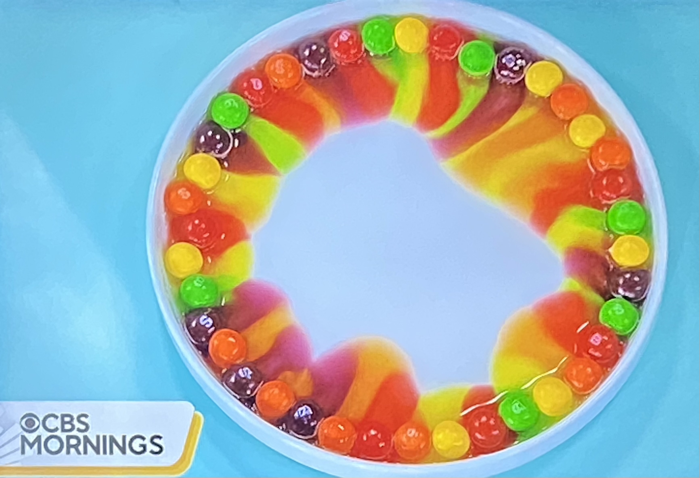
Learning outcomes
De
Scoring guide for Liquids
Suggested procedures overview :
- Put learners in groups, focus their attention, and assess their initial understanding of the focus questions.
- Activity - Explore l
Exploration
Activity:
- Put learners into groups.
- Ask. What happens when a substance is place in water? Accept all answers. Depends on the substance.
- What about skittles?
Invention
- S
- Ask.
Discovery
Lab Notes for activities
Activity 1 - Water, balloons, & other solids, liquids, & gases
Materials :
- Balloons inflated to different sizes (at least three), tub of water, science journal or drawing materials
Focus questions :
What is inside a balloon?
What happens when balloons are put into water?
Before
During
After
Activity 2 - The shapes of liquids
Materials
- Different shaped pans & containers, cookie cutters, water, other liquids
Focus question:
Do liquids have a shape?
Possible procedure:
Explore different liquids to see if you can have them take different shapes.
- Describe what you did.
- Draw pictures to show the shape that you expected and the shape that resulted.
- Write a summary that describes what might determine the different shapes of liquids.
Activity 3 - Surface level of liquids
Materials
- A clear bottle approximately half full of water for each learner
Challenge
Describe how to make the shape of the water in this bottle?
Draw and describe the shape of the water in each bottle.
Draw a bottle with water in an imposible shape.
Activity 2 - Inverted cup without & with paper towel under waterMaterials :
Materials :
- C
Focus questions :
Discover
- How would the energy transfer and temperature be different if the plastic container were made from a thick or thinner material?
- What further questions can you discovery?
- How would different volumes of water transfer differently?
- Like 100 ml hot and 50 ml cold or
- 50 ml cold and 100 ml hot or
- 75 ml hot and 100 ml cold ....
- Decide how assign different values to different groups and let them collect the data to share with the class.
- Share data and graphs.
- Ask. How can we represent the amount of energy insed each cup?
- For example 50 ml of 140 degree water compared to 50 ml of 70 degree water, compared to 100 ml of 70 degree water, to show the amount of enregy in each container (system). Could use a a rectangle or square as a model to explain the amount of energy in a substance?
- For the example: The
- 50 X 140 rectangle's area (7,000 squares)
- is more than 50 X 70 area (3,500 squares),
- but is the same as 100 X 70 (7,000 squares)
- Therefore,
- Area can be a model for the amount of energy in a certain volume with a certain temperature.
- Genius!
Activity 5 - Colored drops in water
Materials :
- small cups, red and blue food coloring, droppers, medium cup with clean water
Focus questions
What happens when food coloring is put into water?
Describe how you will put the food coloring into the water.
Describe what happens when you put the food coloring into the water.
| Liquid | Red drops in ... | Blue drops in ... |
|---|---|---|
Plain water
|
||
Plain water
|
Activity 6 - Colored drops in different liquids
Materials :
- C
Focus questions
What happens when food coloring is put into salt water?
Describe how you will put the food coloring into the salt water.
Describe what happens when you put the food coloring into the salt water.
| Liquid | Red drops in ... | Blue drops in ... |
|---|---|---|
Salt water
|
||
Salt water
|
Describe how putting food coloring into salt water is different than putting it into plain water.
Lab notes 7 - Mixing colored drops from four different solutions
Materials
12 small containers per group, 1-4 droppers per group, paper towels, and four mystery solutions
Focus questions:
- How can you arrange four different liquids from least to most dense?
Challenge
How many different color combination can be made with four colors combined two at a time? RBGC - red, blue, green, clear
- RB, RG, RC,
- BR, BG, BC,
- GR, GB, GC,
- CR, CB, CG,
| Color | Red solution | Blue solution | Green solution | Clear solution |
|---|---|---|---|---|
Red drop in
|
X | |||
Blue drop in
|
X | |||
Green drop in
|
X | |||
Clear drop in
|
X |
Activity 8 - Colored drops in different temperatures of water
Materials :
- small cups, red and blue food coloring, droppers, medium cup with clean water
Focus questions
What happens when food coloring is put into hot and cold water?
Describe how you will put the food coloring into the water?
Describe what happens when you put the food coloring into the water.
Liquid |
Red drops in ... | Blue drops in ... |
|---|---|---|
Hot water
|
||
Cold water
|
Activity 10 - Mixing different temperatures of water without mixing
Materials :
- Styrofoam cup, plastic cup, hot water, ice water, 2 thermometers
Challenge
Find what happens when two different temperatures of water are mixed without mixing?
For example with this ...
Possible procedure:
- Use a styrofoam cup and a plastic cup.
- Place 100 ml of hot water into the plastic cup and 100 ml of ice cold water into the styrofoam cup.
- Then place the plastic cup into the styrofoam cup.
- Record the temperature every minute.
Results:
Water temperature Time |
Hot H2O in styrofoam. | Cold H2O in plastic cup |
|---|---|---|
Start |
||
1 minute |
||
2 minutes |
||
3 minutes |
||
| 4 minutes | ||
| 5 minutes | ||
| 6 minutes | ||
| 7 minutes | ||
| 8 minutes | ||
| 9 minutes | ||
| 10 minutes - End |
How can you illustrate the relationship? (Hint: use graph paper.)
How does the amount of energy given off by the source (hot water) and the amount of energy received by the energy receiver (cold water) compare?
How would the energy transfer and temperature change be different if the plastic container were made from a thick or thinner material?
How would the energy transfer and temperature change have been different if there would have been more warm water than cold water?
What would an energy chain look like?
Graph paper
Activity 10 (discovery) - Exploration of different volumes and temperatures of water
Materials :
- Styrofoam cups, hot water, ice water, 2 thermometers
Challenge
Find a general relationship and model for what happens when two different temperatures of water are mixed.
For example with this ... Possible procedure:
- Place ____ ml of hot water into a styrofoam cup and ____ ml of ice cold water into a styrofoam cup.
- Record the temperatue of each.
- Pour the two together.
- Take the final temperature.
Results:
Water temperatures → Volume ↓ |
Start temperature | Mixed temperature |
|---|---|---|
ml hot |
||
ml cold |
Water temperatures → Volume ↓ |
Start temperature | Mixed temperature |
|---|---|---|
ml hot |
||
ml cold |
Water temperatures → Volume ↓ |
Start temperature | Mixed temperature |
|---|---|---|
ml hot |
||
ml cold |
Water temperatures → Volume ↓ |
Start temperature | Mixed temperature |
|---|---|---|
ml hot |
||
ml cold |
How can we represent the amount of energy insided each cup?
For example ____ ml of ____ degree water
Compared to ____ ml of ____ degree water
Compared to ____ ml of ____ degree water,
Hint: a rectangle or square to represent the amount of energy in a substance?
Science directories
- Science investigations
- Concepts - knowledge base
- Pedagogy
- Main index